
We read your photo as:
Using the information on this worksheet, draw a two-point perspective drawing of a swimming pool and entertainment area.
ScanSolve AI Answer
Step-by-step solution
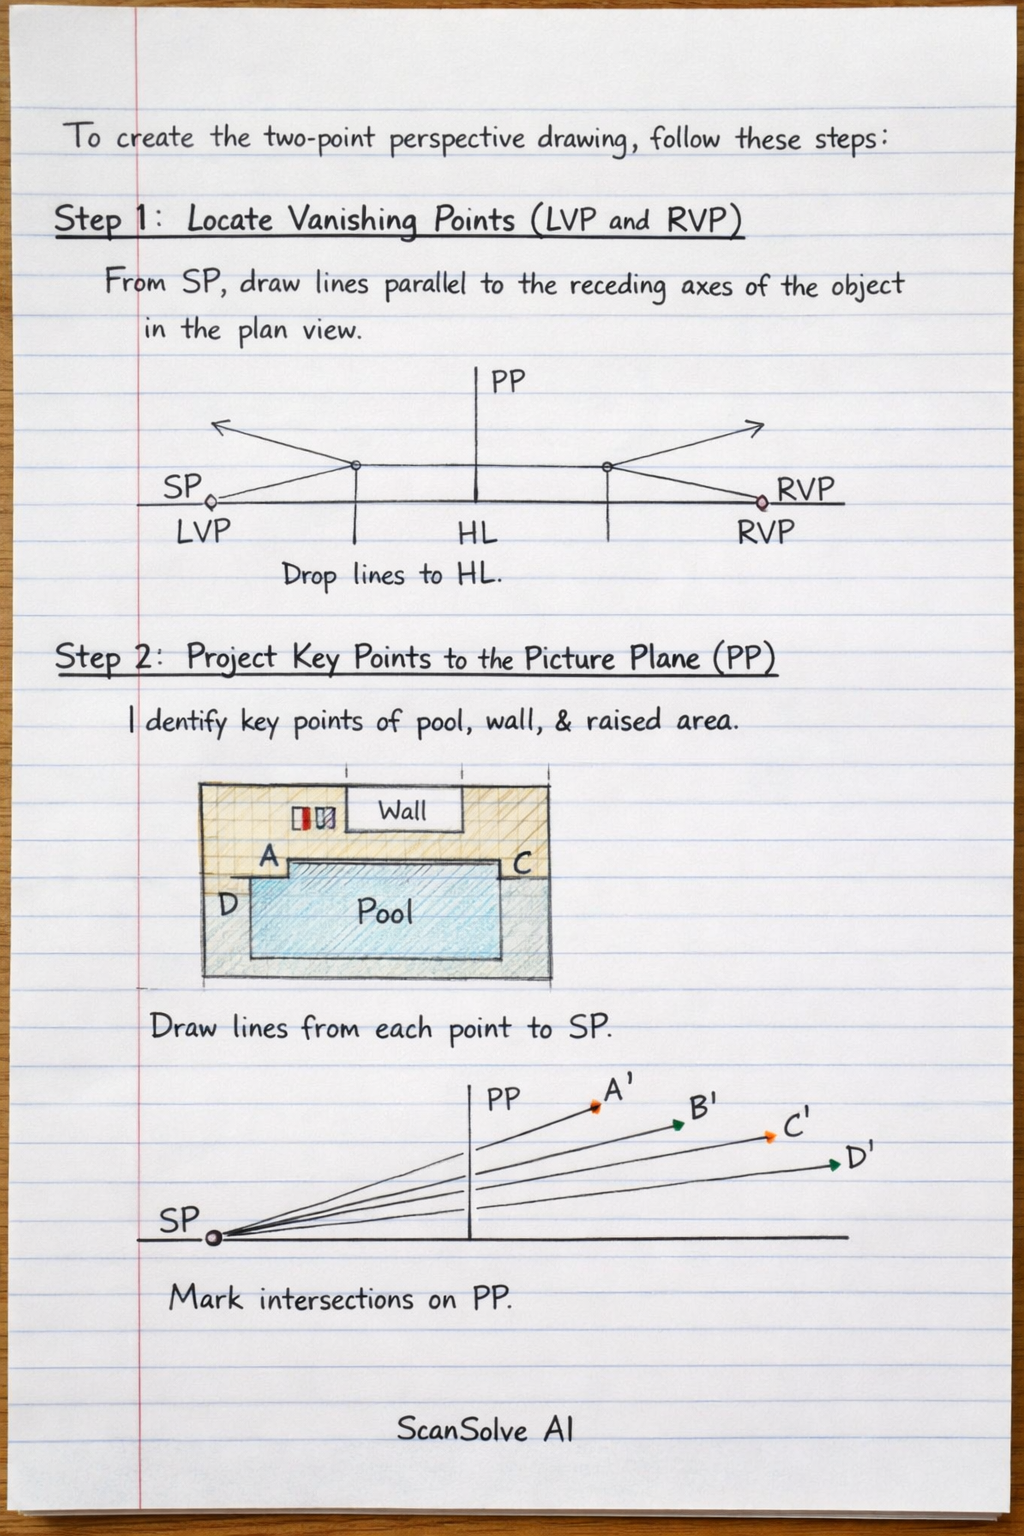
7 stepsTo create the two-point perspective drawing, follow these steps:
Locate Vanishing Points (LVP and RVP)
From the Station Point (SP), draw lines parallel to the two main receding axes of the object in the plan view. Extend these lines until they intersect the Picture Plane (PP). From these intersection points on the PP, drop vertical lines down to the Horizon Line (HL). Label these points on the HL as the Left Vanishing Point (LVP) and Right Vanishing Point (RVP).
Project Key Points to the Picture Plane (PP)
Identify all critical corners and points of the pool, wall, and raised area in the plan view. For each point, draw a line from the point to the Station Point (SP). Mark where these lines intersect the Picture Plane (PP).
Establish True Height Line
Select a corner of the object that is touching or closest to the Picture Plane (PP) in the plan view. Project this point vertically down to the Ground Line (GL). From this point on the GL, draw a vertical line upwards. Using the heights provided in the elevation view (for the wall, pool depth, and raised area), mark the true heights on this vertical line. This is your true height line.
Draw Base Lines and Project Depths
From the true height point on the GL, draw lines to both the LVP and RVP. These form the base of your perspective drawing. For each point projected to the PP in Step 2, drop a vertical line from the PP intersection down to the corresponding base line. These vertical lines represent the perspective depth of the object.
Construct Vertical Edges and Surfaces
From each point established on the base lines in Step 4, draw vertical lines upwards. To determine the correct height for each vertical line, project from the true height line (established in Step 3) to the appropriate vanishing point (LVP or RVP), and then intersect these lines with the vertical lines you just drew. Connect the tops of these vertical lines to the vanishing points to form the top surfaces of the wall and raised area.
Draw the Pool and Raised Area
For the pool, project multiple points along its curved edge from the plan view to the SP, then to the PP, and down to the perspective drawing. Connect these points to form the curved shape of the pool. Remember to show the depth of the pool below the GL. Similarly, construct the raised area, ensuring its height is correctly represented above the GL.
Refine and Darken
Once all construction lines are in place and the entire object is drawn in perspective, darken the visible edges of the swimming pool, wall, and raised area to complete the drawing.
Still stuck on this one?
Ask a follow-up, and the answer starts from this question.
More Mathematics Questions
Handwritten Step-by-Step Solution
Get this as a handwritten image on WhatsApp — like a tutor wrote it for you.
Try on WhatsApp